One of the biggest arguments in favor of using SwiftUI in production apps is the interoperability of UIKit. If you have a problem with achieving something with pure SwiftUI, you can always use UIViewRepresentable to wrap UIKit view and put it in the SwiftUI app only in dozen lines of code. How to do this? Read further.
This article will teach you how to wrap UITextView into UIViewRepresentable protocol, with the Coordinator notifying your app when the text changes.
I used an elementary example with UITextView, but creating UIViewRepresentable will always look very similar. First, you have to wrap your view in the protocol and then build a Coordinator to handle UIKit delegate and data source methods.
UIViewRepresentable
UIViewRepresentable protocol requires confirmation for two methods.
associatedtype UIViewType: UIView
func makeUIView(context: Self.Context) -> Self.UIViewType
func updateUIView(_ uiView: Self.UIViewType, context: Self.Context)
The makeUIView method should create a UIKit view and returns it for SwiftUI to handle. SwiftUI calls this method when the view is created. Then updateUIView is called when your view should be updated. Both methods bring you a UIViewRepresentableContext struct which you can use to get Coordinator or various environment values.
A simple implementation for UITextView may look like this:
struct TextView: UIViewRepresentable {
    func makeUIView(context: Context) -> UITextView {
        let view = UITextView()
        view.layer.borderWidth = 1
        view.layer.borderColor = UIColor.systemGray.cgColor
        view.layer.cornerRadius = 8
        return view
    }

    func updateUIView(_ uiView: UITextView, context: Context) {

    }
}
When used in SwiftUI, the code above will display a UITextView with a border for better visibility.
But you may want to provide the initial text value and refresh text if it changes from outside. For this, you should use a Binding property wrapper and updateUIView.
struct TextView: UIViewRepresentable {
    @Binding var text: String // NEW

    func makeUIView(context: Context) -> UITextView {
        let view = UITextView()
        view.layer.borderWidth = 1
        view.layer.borderColor = UIColor.systemGray.cgColor
        view.layer.cornerRadius = 8
        return view
    }

    func updateUIView(_ uiView: UITextView, context: Context) {
        uiView.text = text // NEW
    }
}
You can use this view in SwiftUI as follow:
struct ContentView: View {
    @State private var text: String = "Initial text"

    var body: some View {
        TextView(text: $text)
    }
}
Coordinator
What you saw is just half of the equation. You will also need to know when UITextView content did changed. For this, UIViewRepresentable offers an optional method:
 associatedtype Coordinator = Void
 func makeCoordinator() -> Self.Coordinator
that you can implement and along with Binding property used to inform SwiftUI about current text UITextView.
First, start with the makeCoordinator method. This method can return any entity, no matter struct or class.
func makeCoordinator() -> Coordinator {
    Coordinator(text: $text)
}
Your Coordinator object will receive the text variable as a Binding (returned with $ syntactic sugar).
Ok, now you can go to Coordinator class implementation.
class Coordinator: NSObject, UITextViewDelegate {
    @Binding private var text: String

    init(text: Binding<String>) {
        self._text = text
    }

    func textViewDidChange(_ textView: UITextView) {
        text = textView.text
    }
}
As you can see, it implements UITextViewDelegate protocol (and NSObject required by it), and in textViewDidChange, it updates the text variable. In this example, the Coordinator is a class, so it needs an init method that sets Binding<String> to local property wrapper using _text syntax.
There is one puzzle missing. You have to connect your Coordinator with UITextView. Do this in makeUIView, but don’t create it there. Use the one provided in context.
func makeUIView(context: Context) -> UITextView {
    let view = UITextView()
    view.delegate = context.coordinator // NEW
    view.layer.borderWidth = 1
    view.layer.borderColor = UIColor.systemGray.cgColor
    view.layer.cornerRadius = 8
    return view
}
Wrap up
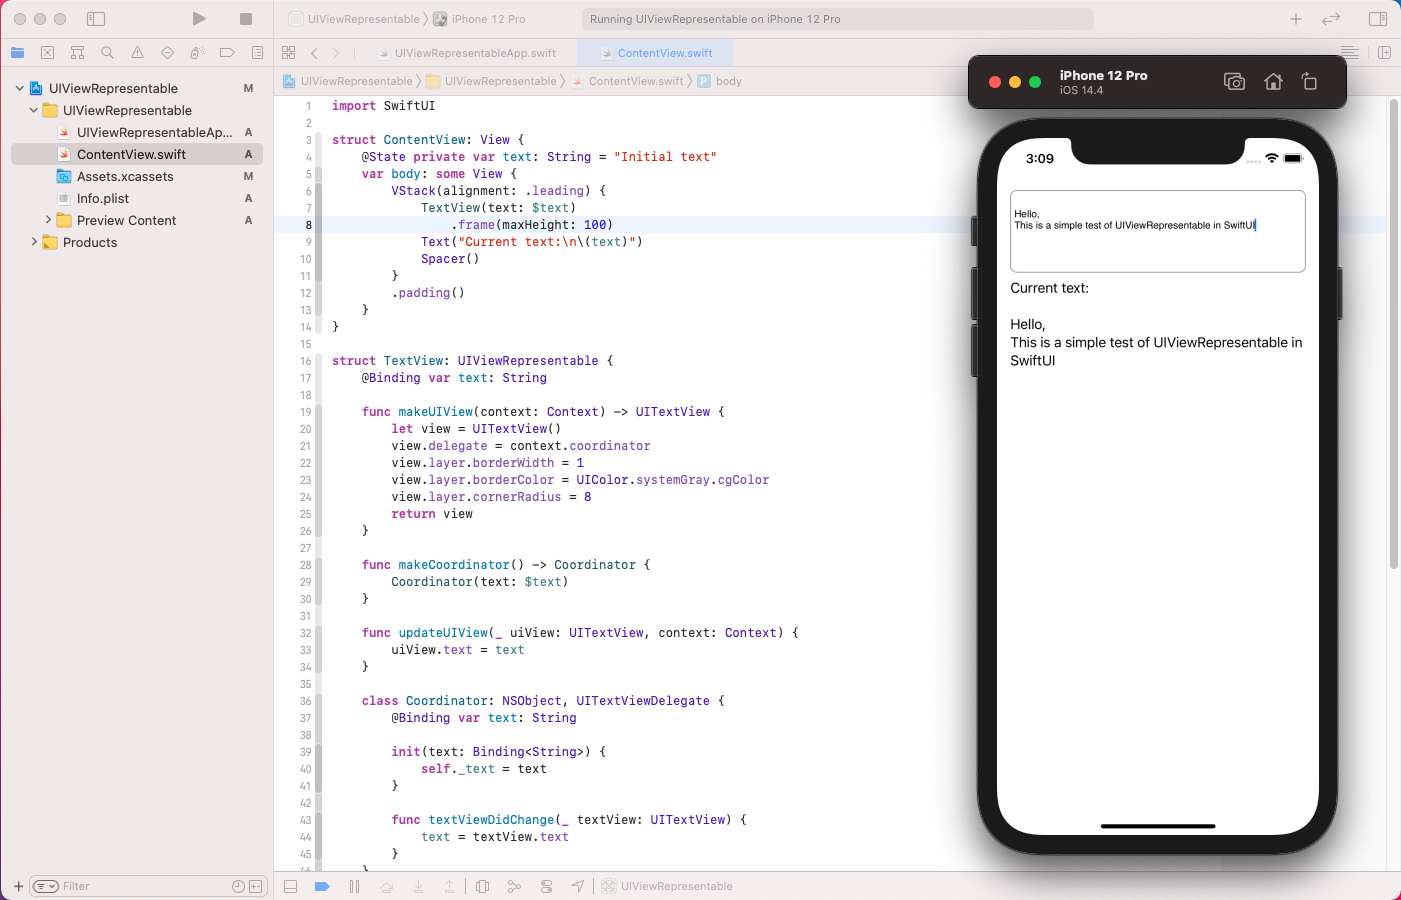
As you can see, using UIKit views in SwiftUI is easy. You can check the complete code, along with an example of how to use it with the State property wrapper below.
struct ContentView: View {
    @State private var text: String = "Initial text"

    var body: some View {
        TextView(text: $text)
    }
}

struct TextView: UIViewRepresentable {
    @Binding var text: String

    func makeUIView(context: Context) -> UITextView {
        let view = UITextView()
        view.delegate = context.coordinator
        view.layer.borderWidth = 1
        view.layer.borderColor = UIColor.systemGray.cgColor
        view.layer.cornerRadius = 8
        return view
    }

    func makeCoordinator() -> Coordinator {
        Coordinator(text: $text)
    }

    func updateUIView(_ uiView: UITextView, context: Context) {
        uiView.text = text
    }

    class Coordinator: NSObject, UITextViewDelegate {
        @Binding private var text: String

        init(text: Binding<String>) {
            self._text = text
        }

        func textViewDidChange(_ textView: UITextView) {
            text = textView.text
        }
    }
}