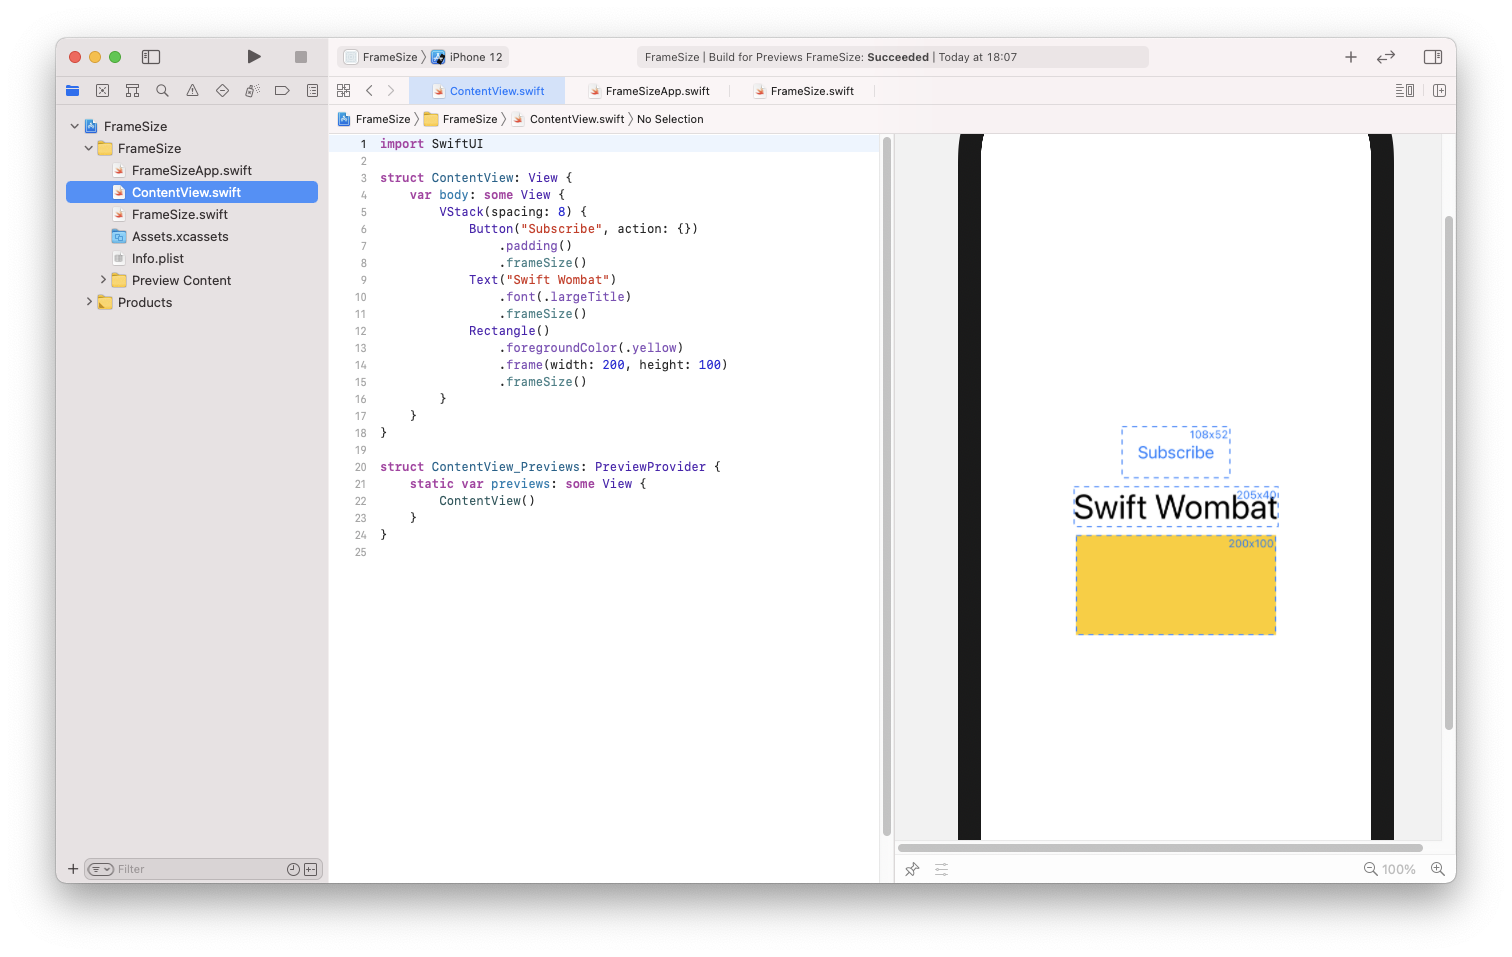
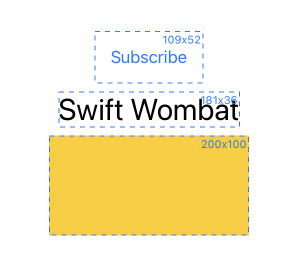
In this SwiftUI tutorial, you will learn what a GeometryReader is and how to use it to prepare a modifier that will display size and dashed frame around a view. It can be handy for debugging. The image above presents the effect of applying a frameSize modifier.
What is GeometryReader?
According to Apple documentation, GeometryReader is a view in which content is represented as a function of its size and coordinate space. It doesn’t sound easy, but in reality, it just means that GeometryReader is a container, and when we provide its content, we get its size. To be precise, not only size but struct called GeometryProxy, which contains size, safeAreaInsets and can calculate container bounds in given coordinate space.
GeometryReader { geometry in
    Text("\(Int(geometry.size.width))x\(Int(geometry.size.height))")
}
This code will display the size of a view you put it in. By default, GeometryReader will take all available space in stacks.
This view can be useful when you need to layout your SwiftUI views based on the given bound but can’t use build layout solutions.
How do you draw a dashed border?
At first, you may think that the border modifier will do the trick. But It turns out this only supports a color and line width. But fear no more. You can achieve the same effect by using an overlay modifier.
Text("Swift Wombat")
    .overlay(
        Rectangle()
            .strokeBorder(style: StrokeStyle(lineWidth: 1, dash: [5]))
    )
In the code above, the Rectangle shape with strokeBorder is created and applied to Text view using the build-in overlay ViewModifier. Experiment with StrokeStyle parameters. Using a dash array, you can specify the length and distance between dashes.
How do you combine those two using ZStack?
Now, you should combine GeometryReader and the dashed line together. To do this, you can use ZStack. It allows displaying one view on top of another. Take a look at this code:
Text("Swift Wombat")
    .overlay(
        GeometryReader { geometry in
            ZStack {
                Rectangle()
                    .strokeBorder(style: StrokeStyle(lineWidth: 1, dash: [5]))
                Text("\(Int(geometry.size.width))x\(Int(geometry.size.height))")
            }
        }
But using it in this form will not be fun. You can do better by abstracting that logic to a custom ViewModifier.
Learn the basics about modifiers and create gradient overlay above any view.
Full, ready-to-use code of frameSize modifier styled a bit with color, ZStack alignment, and font size may look like the one below:
import SwiftUI

extension View {
    func frameSize() -> some View {
        modifier(FrameSize())
    }
}

private struct FrameSize: ViewModifier {
    static let color: Color = .blue

    func body(content: Content) -> some View {
        content
            .overlay(GeometryReader(content: overlay(for:)))
    }

    func overlay(for geometry: GeometryProxy) -> some View {
        ZStack(
            alignment: Alignment(horizontal: .trailing, vertical: .top)
        ) {
            Rectangle()
                .strokeBorder(
                    style: StrokeStyle(lineWidth: 1, dash: [5])
                )
                .foregroundColor(FrameSize.color)
            Text("\(Int(geometry.size.width))x\(Int(geometry.size.height))")
                .font(.caption2)
                .foregroundColor(FrameSize.color)
                .padding(2)
        }
    }
}