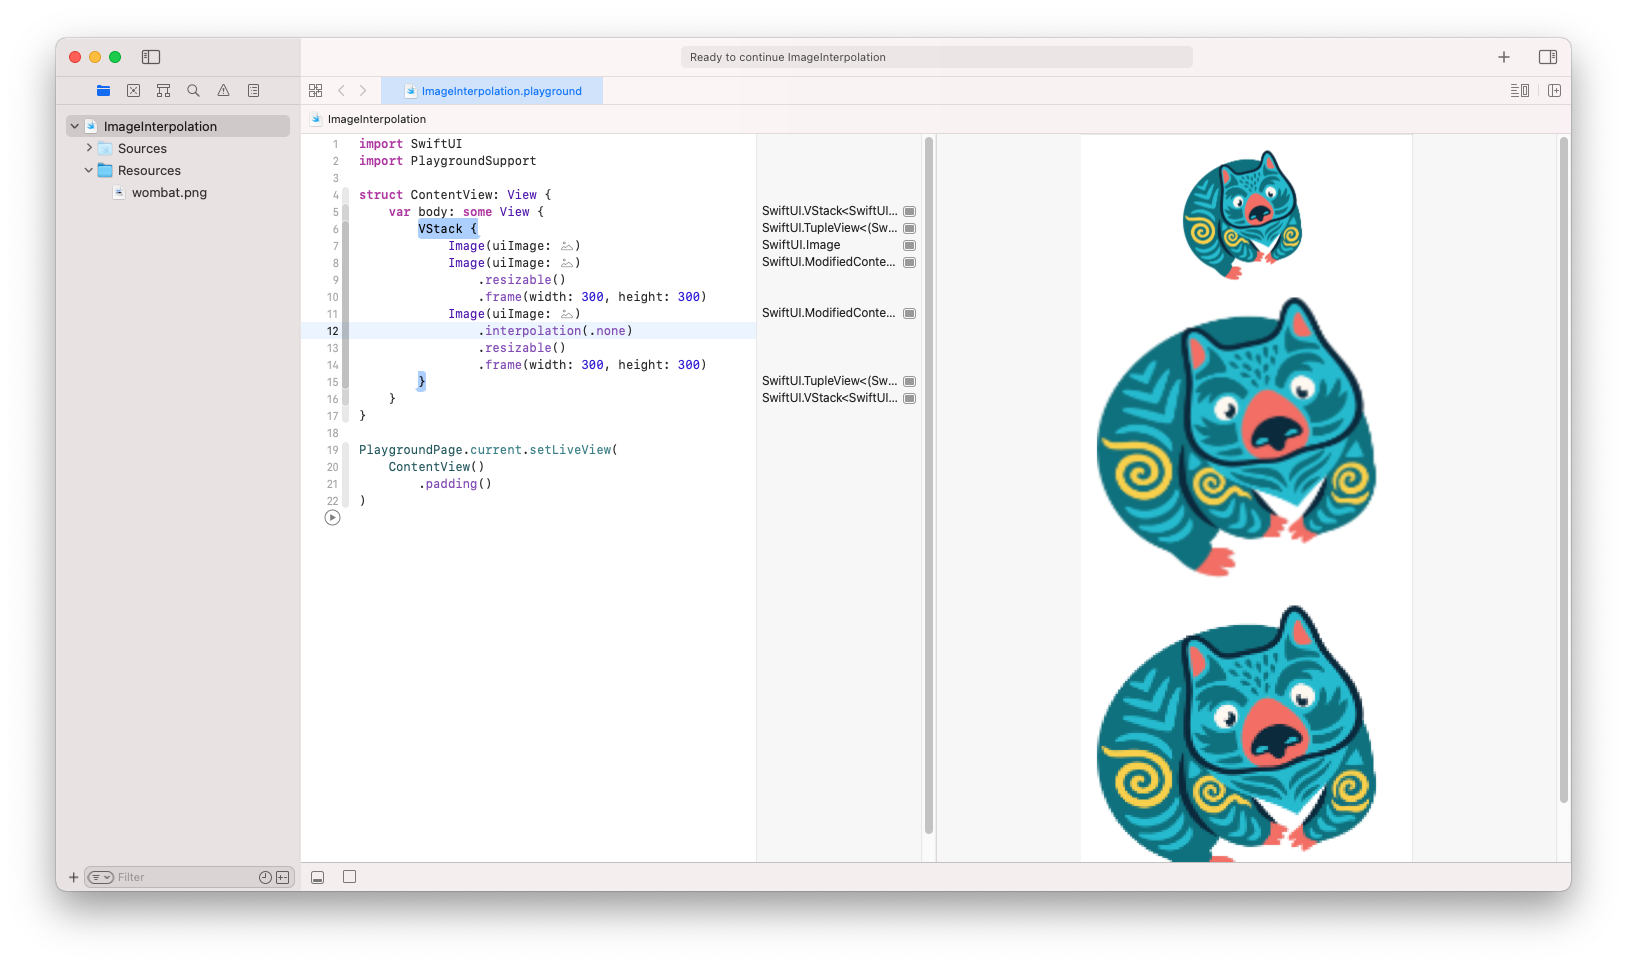
When you are scaling up (and down) a small image in SwiftUI, there is an operation called interpolation. The size of a current image pixel is calculated based on neighbor pixels. It gave a more natural and better-looking effect, but it also means that the image appears blurry (look at the first image in the example above). More advanced interpolations also increase computational complexity.
Sometimes, you want to display the image in a more pixelated form (second image in the example above). There is a view modifier for that. Its name is an interpolation(...) (surprise, surprise).
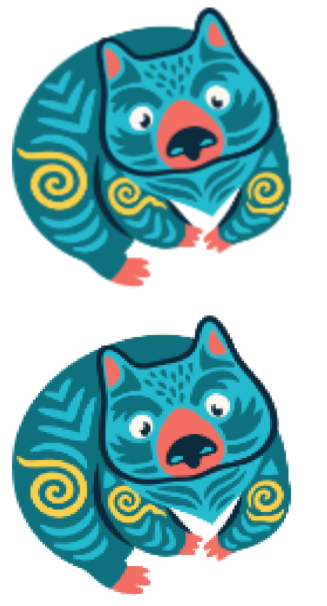
Top: Interpolation - default, Bottom: Interpolation - none
Using this modifier is very easy. It expects one of four Interpolation enum values: high, medium, low, and none. The first three will control interpolation quality, and the last one goes with the most straightforward approach of duplicating current pixel values (and gives pixelated effect).
To change interpolation quality, call the given view modifier on Image view:
Image("wombat")
    .interpolation(.none)
You will probably not need that function too often, but it’s good to know its existence and play with that setting a bit.