If you are using defaults colors for text and backgrounds, iOS/macOS handles dark mode literary by itself. But sometimes, you want to go with your style to make a brand more appealing or differentiate from the competition. Adjusting to dark mode required more work then, but still, the framework offers you many different options to make your life easier.
This article will explain how to use the ColorScheme environment variable to differentiate between light and dark mode and show overlay over the image when it is visible in the dark mode.
Let’s say that you are working on the sign-in screen for your application. You decided to use an image as a background to make it more appealing for users. But then you realize that you pick a photo with too vibrant colors for dark mode. There are few solutions for that.
Xcode project assets can support different assets for different modes. So you can edit the current image or find a different one that the application will use for a dark mode. But let’s say that you want to add new (usually big) assets to the project. What is the other option? You can use the ColorScheme environment variable to check the current mode and display a dark overlay above the image.
SwiftUI offers an Environment property wrapper to get environment variables. One of them, available by default under the colorScheme key, is a ColorScheme enum which can store two values, light and dark. To get that setting, add:
@Environment(\.colorScheme) private var colorScheme: ColorScheme
to your view.
Like nearly everything in SwiftUI, you can achieve a dim effect in many ways. I decided to go with ZStack and to display a rectangle with a translucent color.
if colorScheme == .dark {
    Rectangle()
        .fill(Color.black.opacity(0.3))
}
You can check the complete code example:
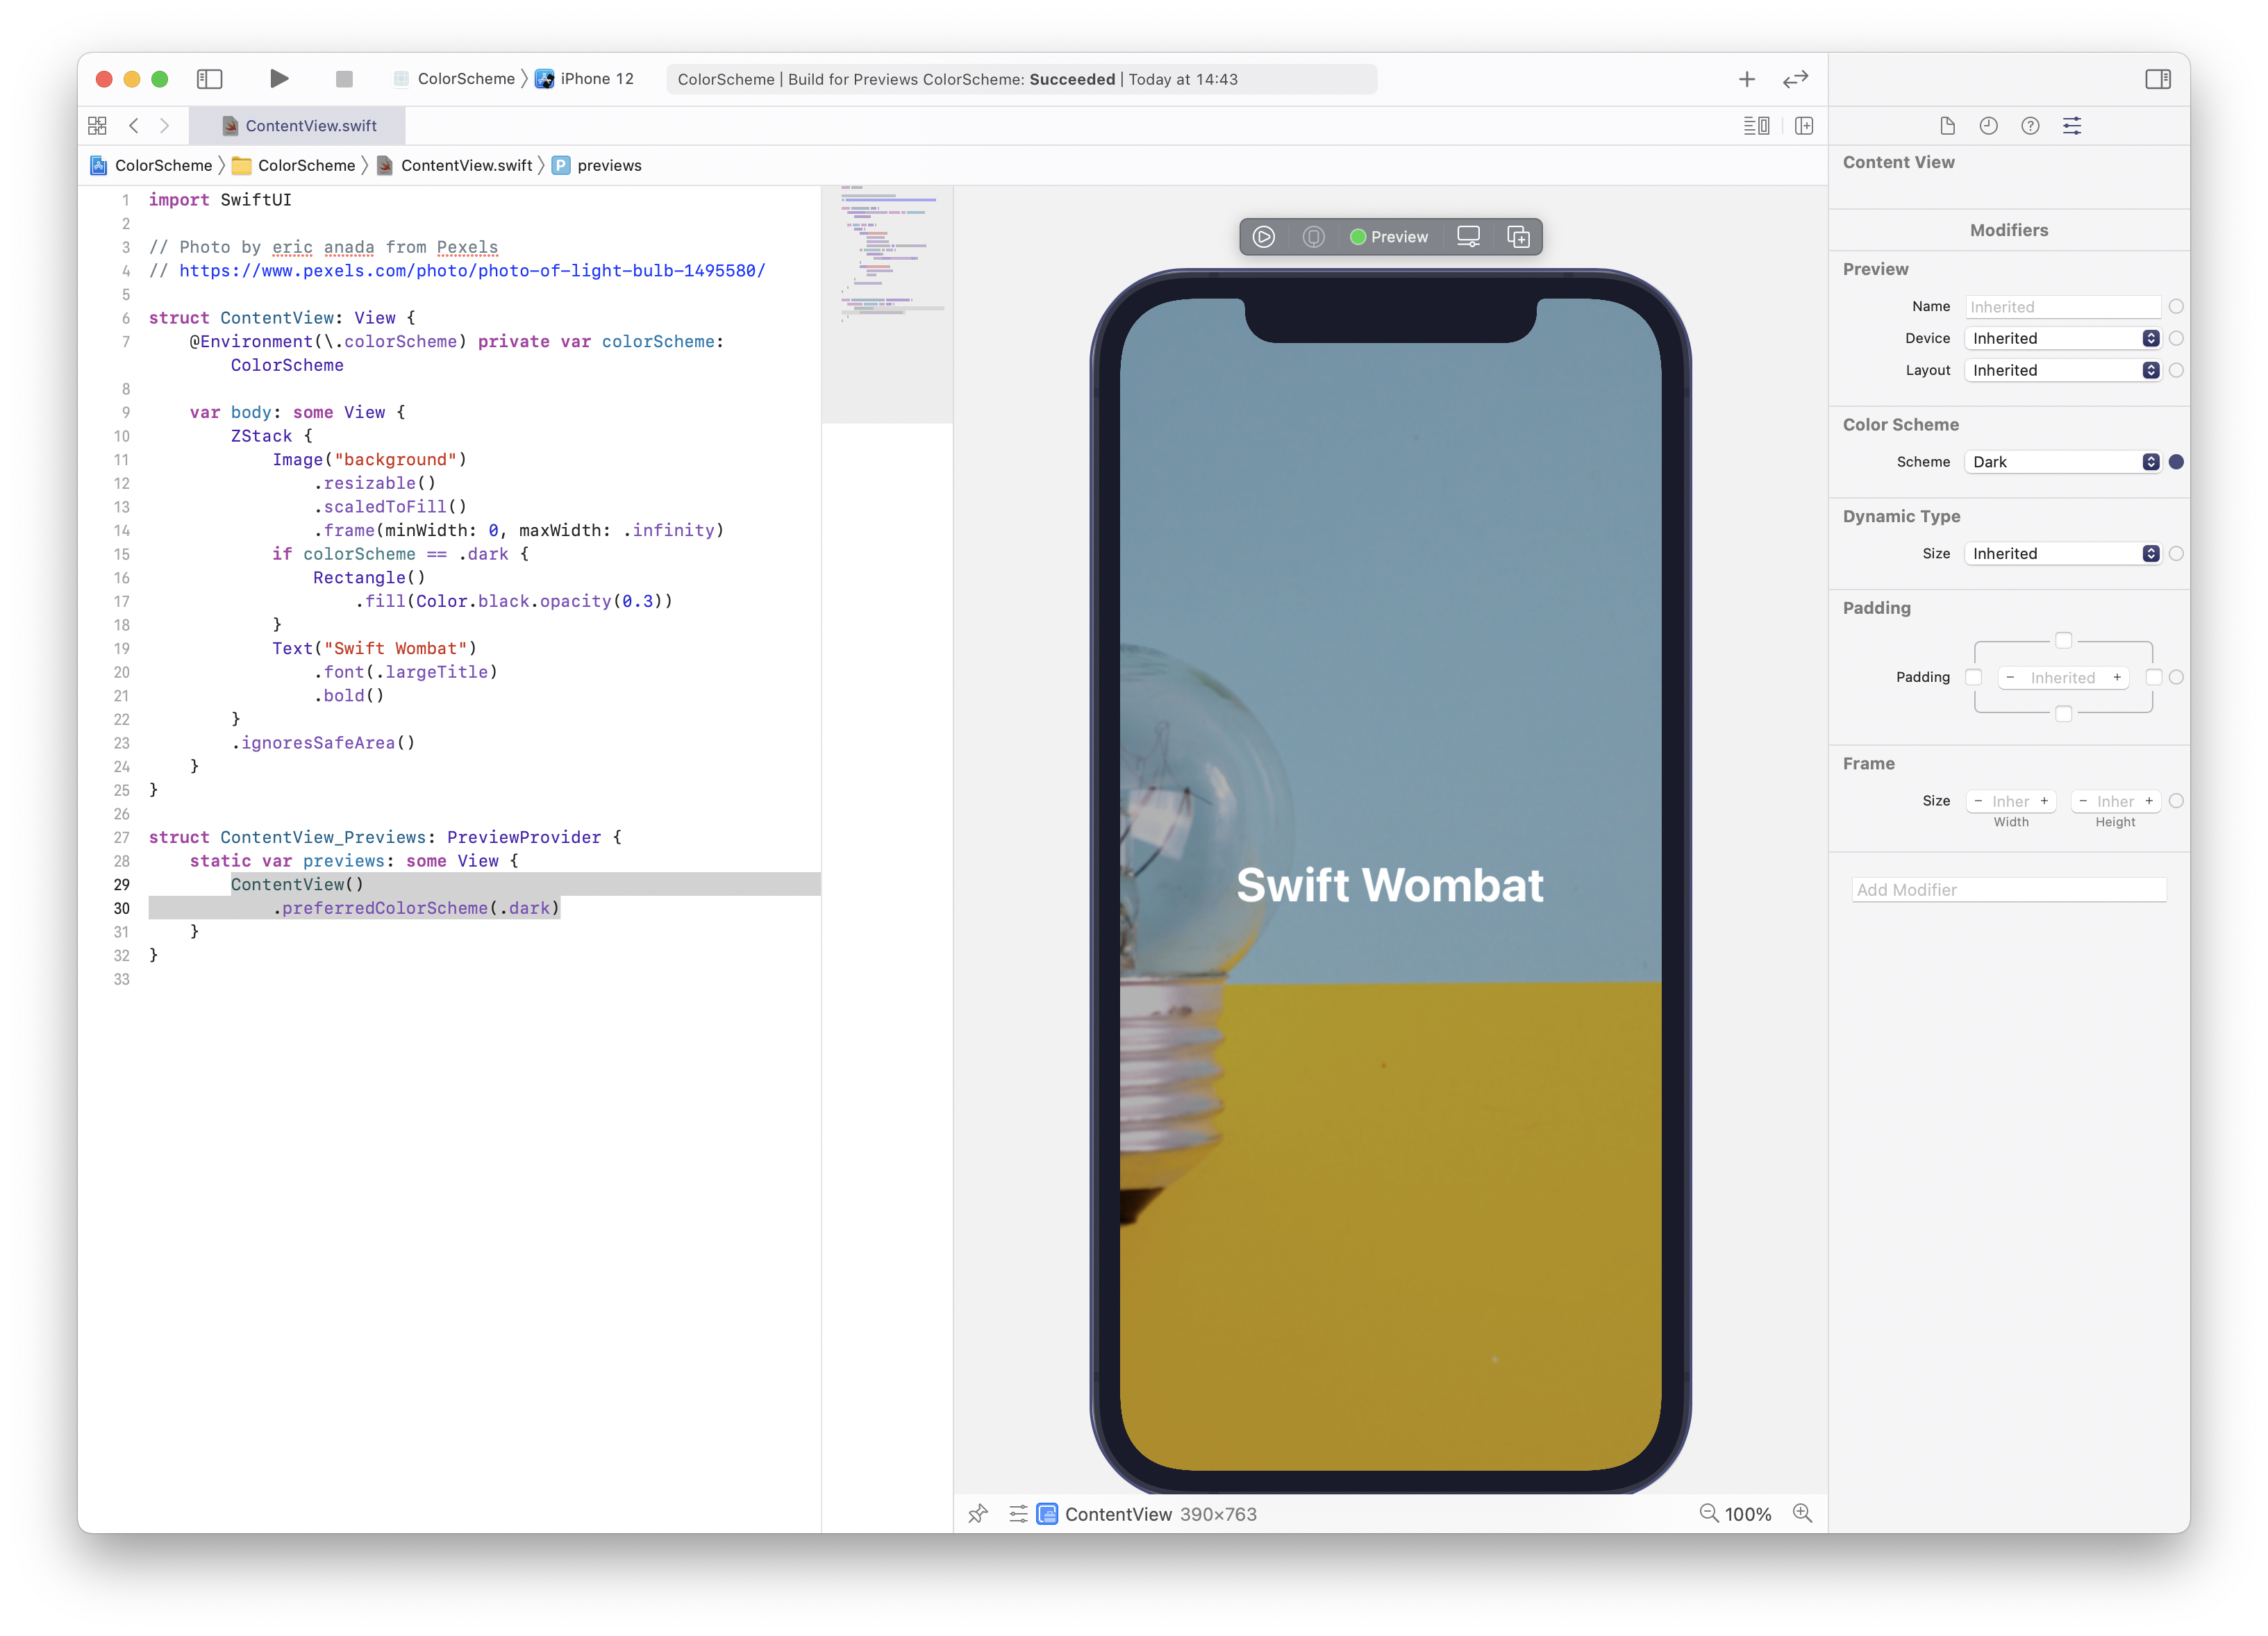
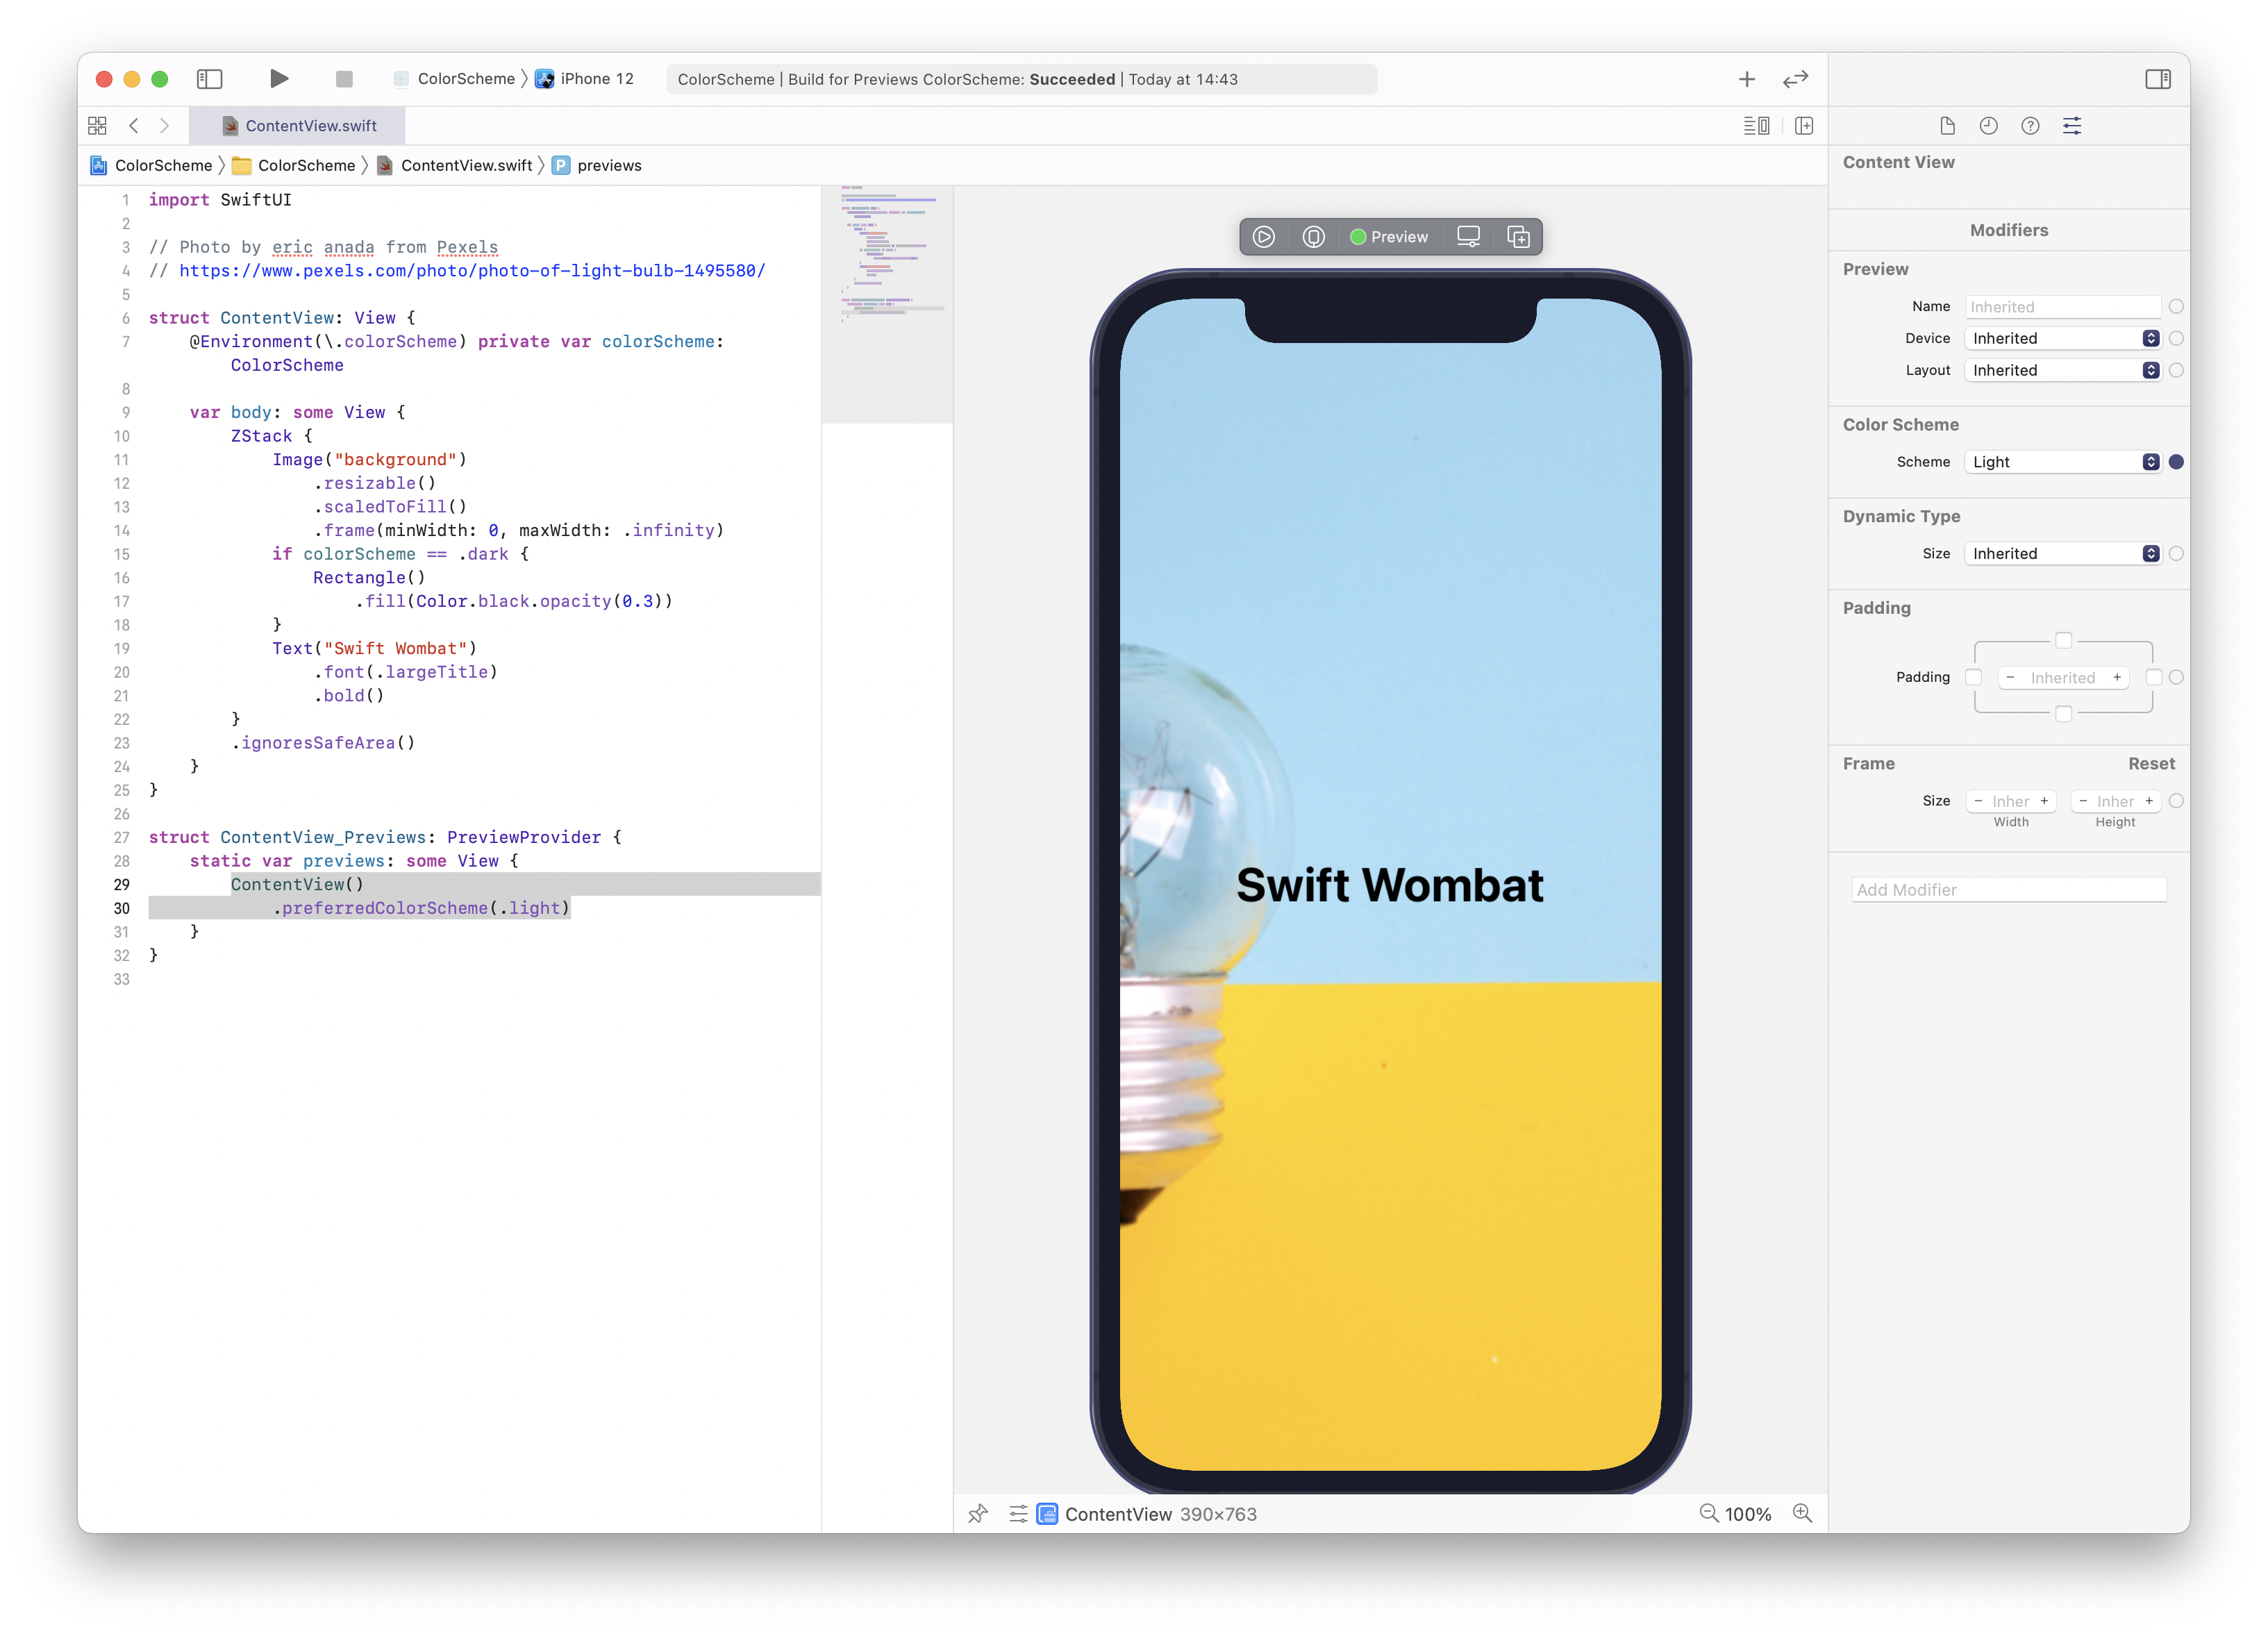
struct BackgroundView: View {
    @Environment(\.colorScheme) private var colorScheme: ColorScheme

    var body: some View {
        ZStack {
            Image("background")
                .resizable()
                .scaledToFill()
                .frame(minWidth: 0, maxWidth: .infinity)
            if colorScheme == .dark {
                Rectangle()
                    .fill(Color.black.opacity(0.3))
            }
            Text("Swift Wombat")
                .font(.largeTitle)
                .bold()
        }
        .ignoresSafeArea()
    }
}
The gallery below presents this effect in light and dark mode. As you can notice, the Swift Wombat title color was adjusted automatically.